This Christmas break we finally decided to bite the bullet and get ourselves a 3D printer. We chose the Creality Ender 3 Pro since it’s relatively cheap (~240€), open source, and seems to have a lot of support in the 3D printing community. It shipped in a day (such interesting times we live in) and we managed to assemble it in around one and a half hours.
Finding and labelling all the parts took slightly longer than it should have since the colors are all different in the assembly guide that came with the kit:
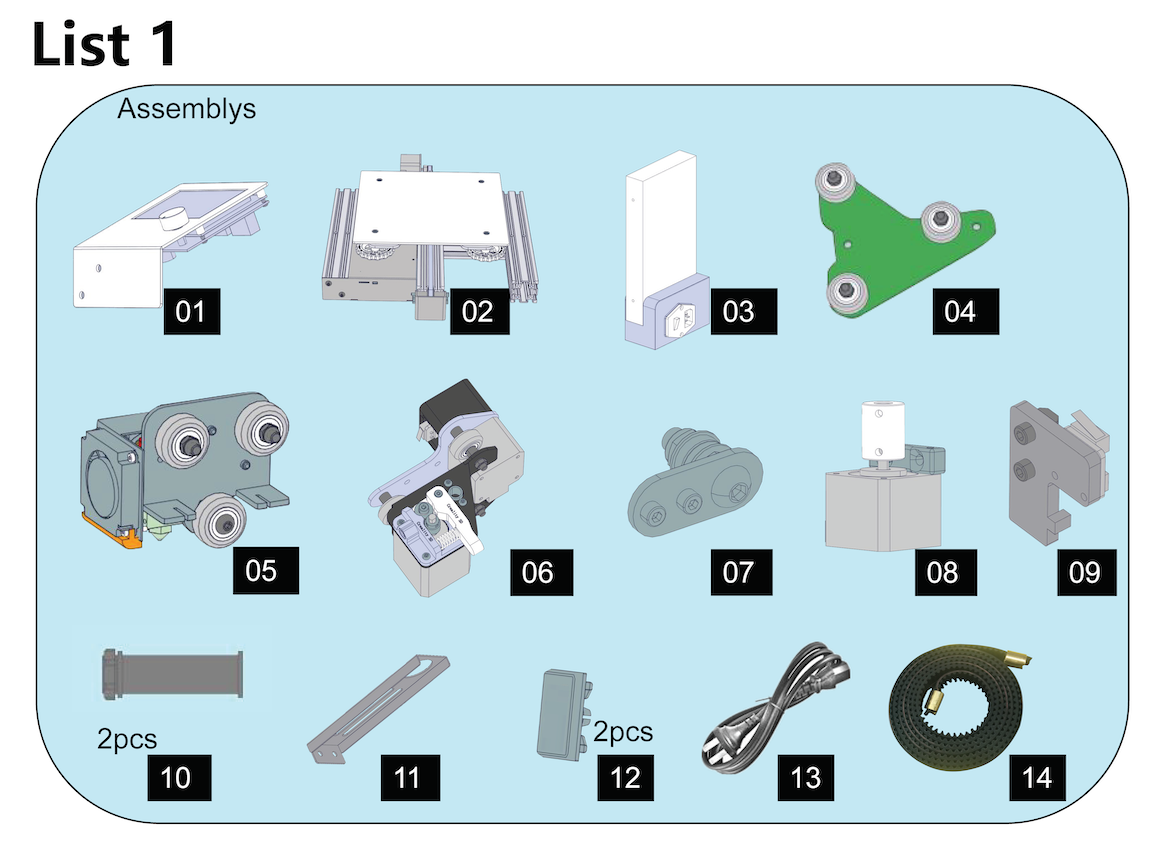
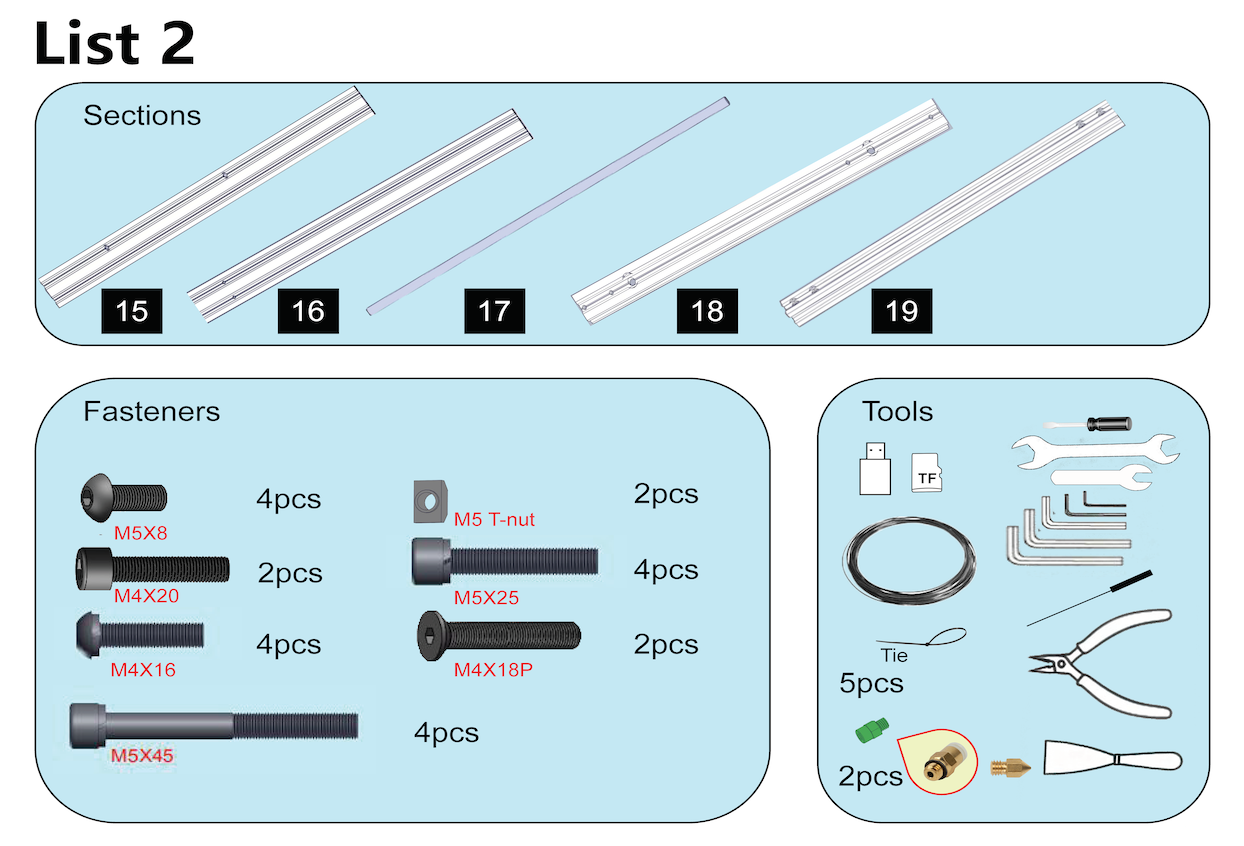
But we managed. Here are all the parts (labeled with post-its) on our multi-purpose blackboard.
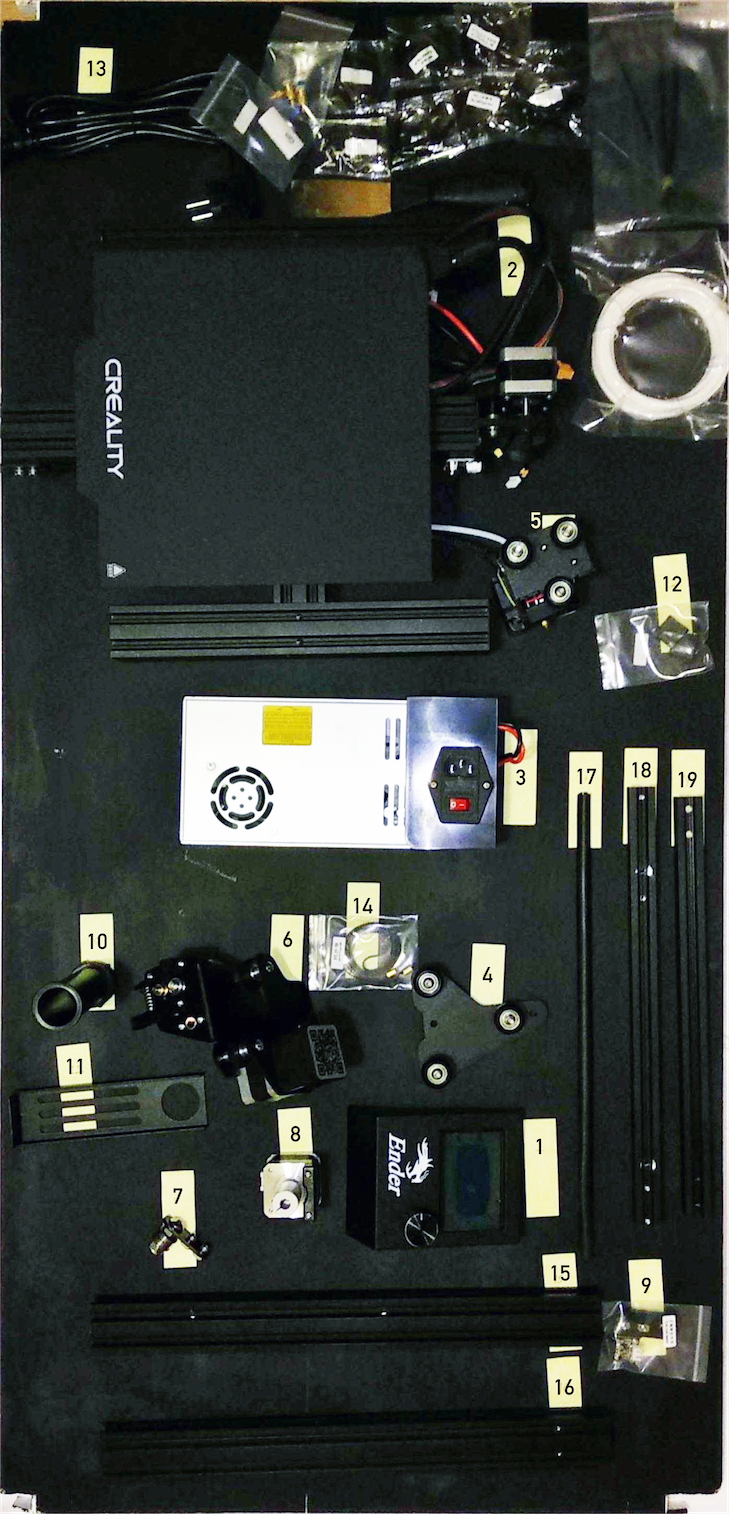
Figure 3: Labeled parts of the Ender 3 Pro
Assembly
Most things were self-evident but there were a few steps where we messed up first due to unclear or incomplete instructions (or just us being stupid). Errors are easy to spot though as later steps don’t work right.
Step 1

Figure 4: Step 1
Make sure to untangle part 5’s cables from underneath part 2 before attaching parts 15 and 16. part 5 has the nozzle head and is basically the most mobile part of the printer, so its cables need to be free from the whole mechanism.
Step 3
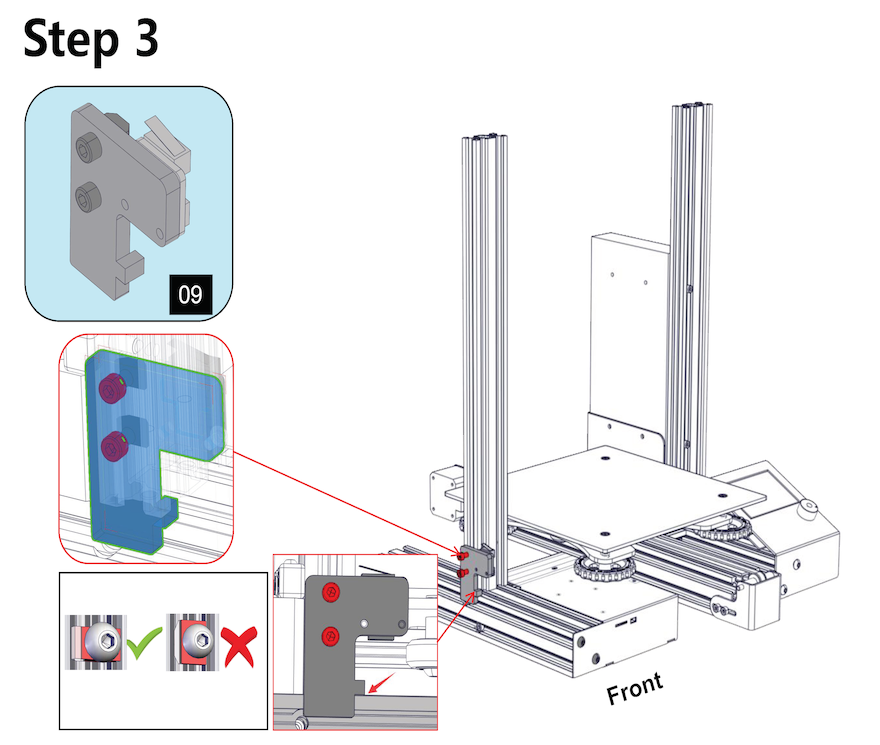
Figure 5: Step 3
The tiny diagram on the bottom left says to position the nut horizontally instead of vertically so that it doesn’t pop out of the gap.
Step 5
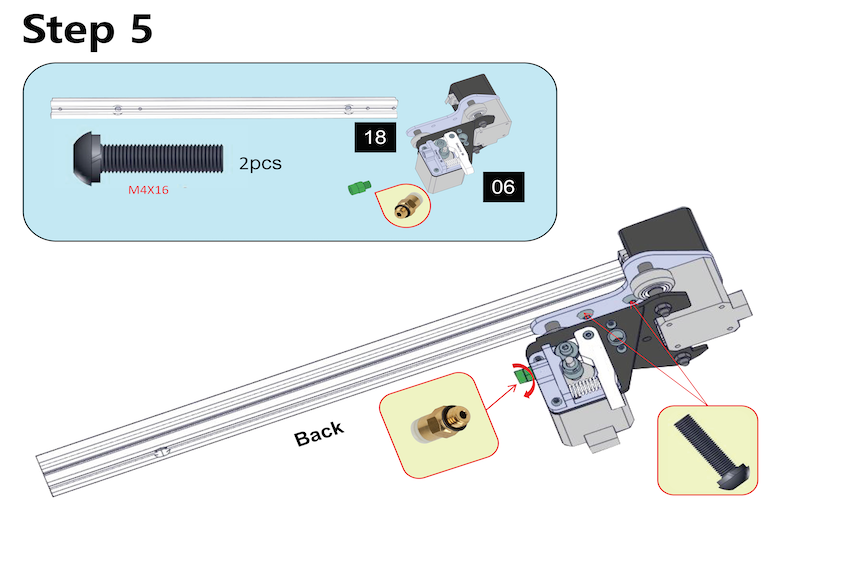
Figure 6: Step 5
Screw from inside part 6 onto part 18
Step 7
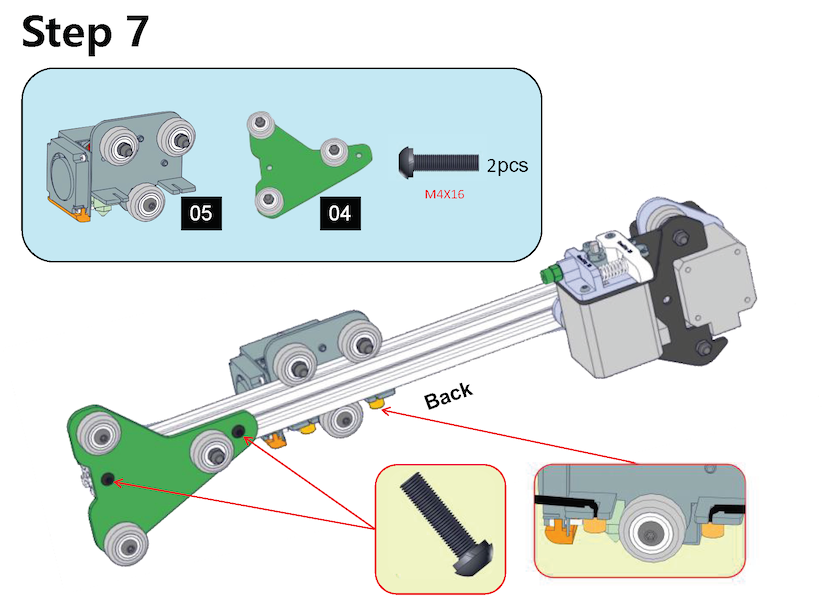
Figure 7: Step 7
Slide in part 5 before part 4! Position part 14 (the rubber belt) inside part 5, the little yellow boxes represent the ends of the belt.
Step 11
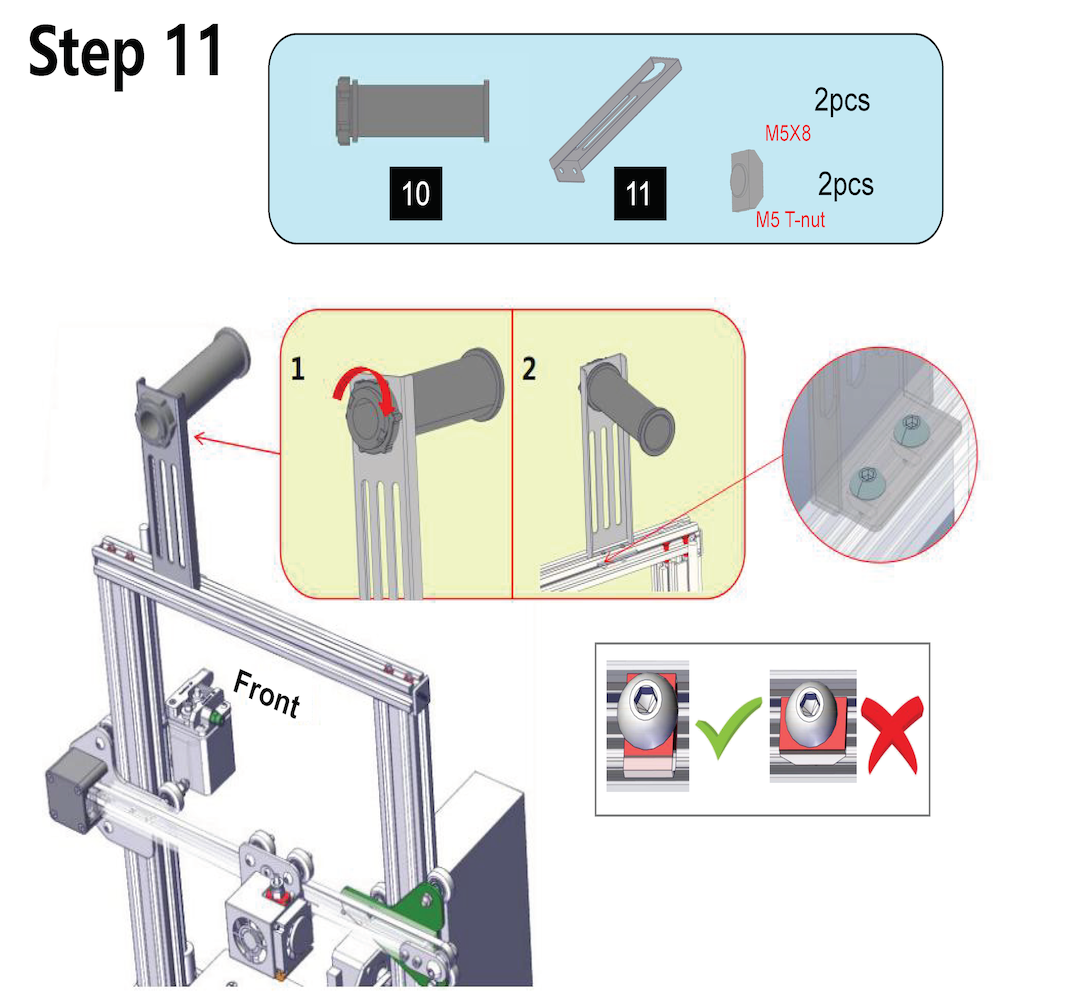
Figure 8: Step 11
Make sure part 5’s cables are inside the frame before screwing the top on. We messed this up and the printer made some distressing noises when the cable got stuck as the nozzle head moved.
Turning it on
It works! There’s a manual in the included USB stick that shows you how to feed in the filament. Then, we need to level the bed. The aim of bed leveling is to get the nozzle very close to the bed at all points when [z=0] (Ideally when printing it’s like a pen on paper). We did the leveling slightly wrong the first time round and the filament came out in wiggly lines which weren’t well packed.
Before leveling, choose “Auto-home” from the dial to test the stepper motors. This option moves the nozzle to [x=0, y=0, z=0], the default home coordinates. Then disable the steppers from the dial to be able to adjust the nozzle location by hand. There are four large wheel screws underneath the bed at each corner. Screwing/unscrewing these moves the bed corner up/down but since all of them act on the same bed it’s best to adjust them sequentially. Start with the corner near the home coordinates and adjust the nozzle until a sheet of paper can barely fit between it and the bed. Move the nozzle to the next corner (anti-clockwise) and repeat the same process. We found that it’s best to keep the sheet of paper under the nozzle at all times and move it back and forth to check that it can move. If you feel the nozzle starting to scratch the surface of the bed while moving it to the next corner, then the next corner should be adjusted to prevent this.
Even after all this we noticed that the base of printed pieces were a bit compressed and the nozzle made some clicking noises on the first layer, indicating that it might be too close to the bed. We fixed this by using the “Baby Step Z” functionality in the Tune menu, while printing something (at the first level of the print), until the printing pattern seemed okay and no noises were made.
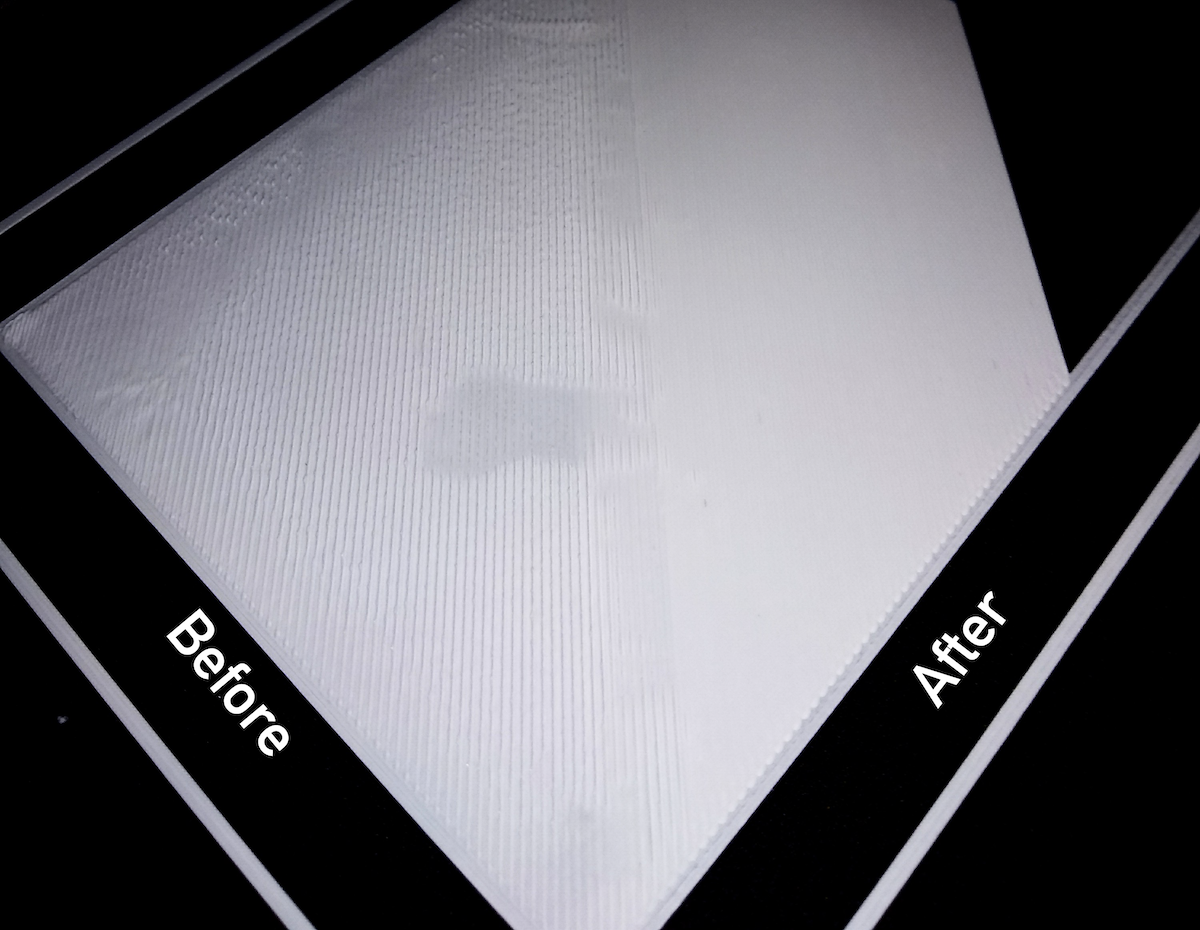
Figure 9: Optimal bed levelling (probably)
Testing it out
DO NOT try printing the dog.gcode present in the included USB stick - it’s supposed to take ~6 hrs and the white filament that comes with the kit isn’t nearly enough to print all of it.
We tried out the Micro All-in-One 3D Printer Test instead. Loaded it up in Ultimaker Cura, with the Creality Ender 3 profile, and hit slice. NOTE! : Make sure to flip the model around onto its flat base before slicing, otherwise the printer tries to print it on the smaller edge and fails miserably (oops).
Cura estimated a time of 2 hrs 26 min for the print (with 0.4mm nozzle, 0.2mm precision, 30% infill, no supports, no adhesion) while the Ender’s display (which shows the percentage of the print which is supposedly done) had an estimate of around 9 hrs(!). Cura won though, the print took 2 hours 26 minutes and 27 seconds (of which approximately 100% was spent staring at the printer printing).
Here’s what it looks like:
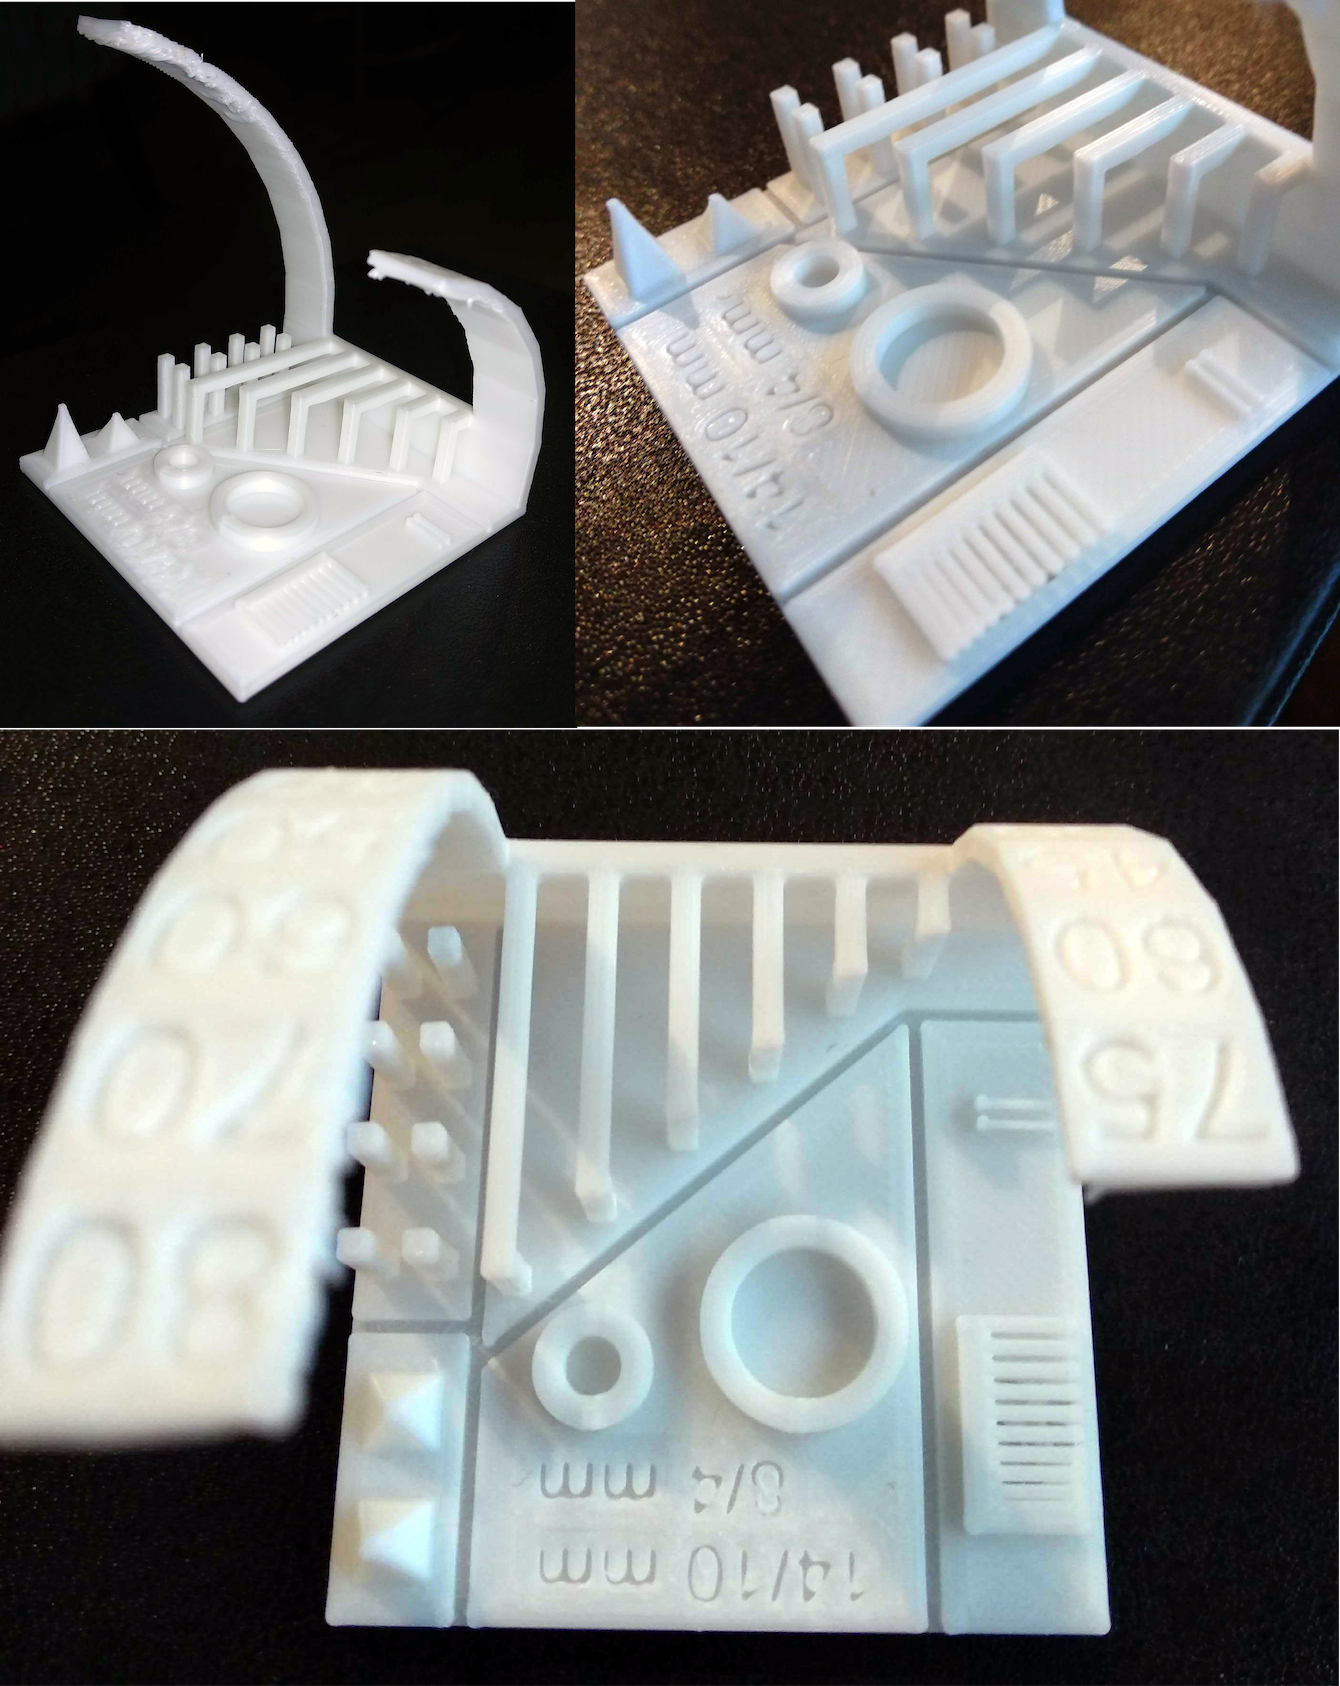
Figure 10: Micro All-in-One 3D Printer Test
This print is supposed to test a bunch of things, two notable ones:
Bridging
We were a bit confused how any printer could handle making bridges across space as if gravity didn’t exist, but turns out the filament dries almost instantaneously, and as long as it does one line at a time, with enough time to set, everything works out great.
Half-arches
The two curved arches were meant to test how well the printer can handle overhangs without supports. As you can see, it handled it pretty well up to 60-70 degrees and then started messing things up - you can see the individual filament threads from the back. The nozzle head kept butting against the longer arch as it was making it so the base of this arch was pretty brittle. It snapped with the slightest pressure and we got a bonus test for free - how well does PLA stick with instant-glue (pretty well). Still, we can use this piece to decide when to add supports to future models.
Next steps
We’re pretty excited about this printer and plan to use it for a bunch of things - adapters/parts to extend our microscope, boxes to organize all our sensors, hardware upgrades for the printer itself, and so on. The first project, though, is to recreate this board game designed by Guy Debord (of The Society of the Spectacle fame) with a board made up of wooden blocks we picked up at a toy store, and 3D printed game pieces. Coming up!